
4×8 hardie panel installation pdf
HardiePanel Vertical Siding, often found in downloadable PDF guides, offers a durable, factory-primed fiber-cement solution for exterior cladding, available in diverse textures.
What are 4×8 Hardie Panels?
4×8 Hardie panels represent a popular dimension within the James Hardie fiber cement siding product line. Detailed specifications, including installation guides, are readily available as PDF downloads from the official James Hardie website and various contractor resources. These panels, measuring four feet by eight feet, are engineered for vertical siding applications, offering a streamlined aesthetic. They’re factory-primed, accepting a wide range of paints and finishes. The PDF documentation outlines crucial details regarding panel thickness – typically 5/16 inch – and the diverse textures available, catering to varied architectural styles.
Benefits of Using Hardie Panels
Hardie panels, detailed in comprehensive PDF installation guides, deliver exceptional durability, resisting rot, pests, and fire damage. Their longevity minimizes long-term maintenance costs. The factory-primed surface ensures excellent paint adhesion and color retention. Utilizing 4×8 panels streamlines installation, reducing labor time and waste. PDF resources highlight their dimensional stability, preventing warping or cracking. Furthermore, Hardie siding enhances a home’s curb appeal and potentially increases property value, making them a sound investment detailed within the downloadable guides.
Safety Precautions for Installation (04/28/2026)
PDF guides emphasize secure scaffolding with adjustable legs, safe window well access, and leveling on uneven ground—critical for preventing accidents during Hardie panel installation.
Scaffolding Requirements
PDF installation resources strongly advise utilizing scaffolding equipped with adjustable screwjack legs to ensure precise plumbing and leveling. Prioritize a setup that maintains a safe distance – approximately two feet – from the building’s exterior, avoiding contact with potentially unstable ground. Employ hangers, resembling ladder jacks, for secure walk and stock planks.
If the ground is muddy, create a stable base using layers of sand, wood, and concrete blocks before setting up the screw jacks. This layered approach provides a firm foundation. Always double-check the scaffolding’s stability before commencing work with the heavy Hardie panels.
Working with Window Wells
PDF guides highlight the need for extreme caution when working near window wells. Straddling window wells safely requires a robust support system; consider using concrete blocks on either side, overlaid with doubled 2×10 planks secured with bent nails. Ensure the scaffolding doesn’t directly rest on the window well structure.
Maintain a safe working distance and avoid leaning into the well. Prioritize stability and a secure footing. Remember, compromised support around window wells can lead to serious accidents during Hardie panel installation.
Leveling on Uneven Ground
PDF installation manuals emphasize meticulous leveling, especially on irregular terrain. A substantial base of sand is crucial for creating a stable platform. Layer sand beneath wood pieces, potentially adding concrete blocks for additional support, then utilize screw jacks for precise adjustments.
Employ scaffolding with adjustable legs to achieve plumb and level surfaces. Prioritize a solid foundation to prevent panel misalignment and ensure a professional, structurally sound Hardie panel installation. Stability is paramount for safety and quality.
Tools and Materials Needed
PDF guides detail essential tools for cutting and fastening Hardie panels, alongside required materials like panels, appropriate fasteners, and crucial flashing components.
Essential Tools for Cutting and Fastening
PDF installation resources emphasize utilizing appropriate cutting tools for Hardie panels, often recommending fiber-cement specific blades for saws. Beyond cutting, specialized fasteners are critical; these are typically corrosion-resistant and designed for fiber-cement. A pneumatic nailer or screw gun significantly speeds up the process. Don’t forget safety gear – gloves, eye protection, and a dust mask are essential when cutting. Accurate measurements and a quality speed square are also vital for precise cuts and proper alignment, ensuring a professional finish as detailed in installation guides.
Required Materials: Panels, Fasteners, Flashing
Hardie panel projects, as outlined in installation PDFs, necessitate precise material calculations. Obviously, you’ll need the 4×8 panels themselves, ensuring sufficient quantity plus waste allowance. Crucially, use specifically recommended fasteners – galvanized or stainless steel – to prevent corrosion. Flashing around windows and doors is non-negotiable for weatherproofing. Don’t overlook building paper or a moisture barrier, and appropriate sealant. Accurate material lists are often included within the downloadable guides for streamlined purchasing.

Preparing the Wall for Installation
PDF guides emphasize checking framing, installing a moisture barrier, and creating a consistent gap between Hardie panels for proper expansion and contraction.
Checking Wall Structure and Framing
PDF installation manuals consistently stress the critical importance of a sound wall structure before commencing Hardie panel application. Thoroughly inspect the framing for any rot, damage, or inconsistencies. Ensure studs are properly spaced and securely fastened, adhering to local building codes. Verify the wall is plumb and level; any deviations must be corrected prior to panel installation to prevent future issues; A solid, well-prepared framing system is foundational for a durable and aesthetically pleasing finished product, as detailed in comprehensive Hardie guides.
Moisture Barrier Installation
Hardie panel installation PDF guides universally emphasize the necessity of a properly installed moisture barrier. This crucial step prevents water infiltration, protecting the wall structure and ensuring longevity. Overlap seams according to manufacturer specifications, typically six inches, and seal all penetrations. The barrier should be continuous and fully adhered to the sheathing. Proper detailing around windows and doors is paramount, as highlighted in detailed diagrams within the Hardie documentation, safeguarding against potential water damage.
Creating a Proper Gap Between Panels
Hardie panel installation PDFs consistently detail the importance of a consistent gap between panels – typically 1/8 to 1/4 inch. This allowance accommodates expansion and contraction due to temperature fluctuations, preventing buckling or cracking. Maintaining this gap ensures the siding system can move naturally without compromising its integrity. Use spacers during installation to achieve uniformity, as illustrated in the Hardie guides, and avoid butting panels tightly together.

Installation Process: Step-by-Step
PDF guides emphasize precise alignment for the first Hardie panel, utilizing hangers for walk/stock planks, and sometimes pulley systems for lifting sheets safely.
Starting the First Panel – Alignment is Key
PDF installation manuals consistently stress the critical importance of perfectly aligning the initial 4×8 Hardie panel; this foundational step dictates the success of the entire project. Achieving plumb and level is paramount, often requiring adjustable screwjack legs on scaffolding. Careful consideration must be given to potential obstructions like window wells, necessitating safe bridging with materials like doubled 2×10 planks and concrete blocks. Remember, a slightly off-kilter start amplifies errors down the line, so double-check measurements before fastening!
Using Hangers for Walk and Stock Planks
4×8 Hardie panel installation PDF guides frequently recommend utilizing specialized hangers – resembling ladder jacks – for secure walk and stock plank support. These hangers hook onto the structure, maintaining a safe 2-foot distance from the building, avoiding contact with potentially muddy ground. This setup enhances stability and prevents damage during panel handling. Employing this method, alongside adjustable scaffolding, ensures a secure work platform, crucial for efficient and safe installation, as detailed in comprehensive installation resources.
Lifting Panels with Pulley Systems
Many 4×8 Hardie panel installation PDF resources illustrate innovative lifting techniques using pulley systems. A DIY approach involves securing ropes and pulleys to the wall with screws and spacers, creating a block-and-tackle effect for easier panel ascension. Drilling pilot holes within the panel areas, later concealed by fasteners, facilitates pulley attachment. While labor-intensive, this method proves invaluable when direct mechanical lifts are impractical, offering controlled panel positioning during installation, as demonstrated in detailed guides.
Flashing and Weatherproofing
4×8 Hardie panel installation PDF guides emphasize crucial flashing around windows and doors, protecting against water damage and ensuring long-term structural integrity.
Importance of Flashing Around Windows and Doors
4×8 Hardie panel installation PDF documents consistently highlight flashing as a non-negotiable step. Proper flashing directs water away from vulnerable areas, preventing rot, mold, and structural compromise. Failing to flash correctly invites significant, costly repairs down the line.
Detailed guides illustrate how to integrate flashing with windows and doors, creating a watertight seal. This involves layering materials – typically metal or flexible membrane – to channel water outwards, safeguarding the building’s interior and exterior walls. It’s a critical investment in longevity.
Proper Flashing Techniques
4×8 Hardie panel installation PDF guides emphasize overlapping flashing materials, ensuring water sheds effectively. Begin with base flashing, extending up the sill, then integrate side flashing, tucked securely under siding. Top flashing directs water away from the window/door head.
Seal all flashing intersections with high-quality sealant. Pay close attention to corners and penetrations. Correct lapping sequences and proper sealant application are vital for a watertight barrier, preventing moisture intrusion and maintaining the integrity of the Hardie panel system.
Cutting and Fitting Hardie Panels
4×8 Hardie panel installation PDF resources detail using specialized tools for precise cuts, crucial for corners and openings, ensuring a seamless, weather-resistant finish.
Using Appropriate Cutting Tools
4×8 Hardie panel installation PDF guides emphasize utilizing specific cutting tools for optimal results. Avoid standard wood-cutting saws, as they generate excessive dust and can damage the material. Fiber cement requires tools like carbide-tipped saws, shears, or scoring knives. Dust control is paramount; always wear a respirator and utilize dust collection systems during cutting. Proper tool selection minimizes chipping and ensures clean, accurate cuts, vital for a professional-looking installation. Remember to follow manufacturer’s recommendations detailed within the PDF for tool specifications and safety precautions.
Making Precise Cuts for Corners and Openings
4×8 Hardie panel installation PDF documents detail techniques for accurate cuts around corners and openings. Precise measurements are crucial; utilize templates for recurring cuts. Employ a fiber cement scoring knife for clean breaks, especially for smaller adjustments. For complex angles, a miter saw with a carbide-tipped blade is recommended. Remember to account for reveal spacing as outlined in the PDF. Careful cutting minimizes gaps and ensures a tight, weatherproof fit, enhancing the overall aesthetic and structural integrity of the siding.

Fastening Techniques
4×8 Hardie panel installation PDF guides recommend specific fasteners and spacing for secure panel attachment, ensuring long-term durability and resistance to weather elements.
Recommended Fasteners and Spacing
4×8 Hardie panel installation PDF documents consistently emphasize the critical role of proper fastening. Typically, corrosion-resistant, galvanized or stainless steel nails or screws are advised. Spacing generally falls around 6-8 inches along panel edges and 12 inches on field nailing.
Always consult the specific PDF guide for your product, as variations exist based on substrate and local building codes. Incorrect fasteners or spacing can compromise the panel’s integrity, leading to issues like oil canning or failure during high winds.
Ensuring Proper Panel Attachment
4×8 Hardie panel installation PDF guides stress the importance of consistent, flush panel attachment. Fasteners must penetrate the framing members sufficiently – typically at least 1 inch – to achieve a secure hold. Avoid overdriving fasteners, which can damage the panel’s surface and compromise weather resistance.
Refer to the PDF for specific recommendations regarding fastener head size and embedment depth. Proper attachment prevents warping, cracking, and potential detachment, ensuring long-term durability and aesthetic appeal.
Addressing Common Installation Issues
4×8 Hardie panel installation PDF resources detail solutions for uneven surfaces and misaligned panels, emphasizing careful planning and precise cutting techniques.
Dealing with Uneven Surfaces
Hardie panel installation PDF guides frequently address uneven wall surfaces, recommending a layered approach to leveling. This often involves a “crapload of sand” as a base, followed by wood pieces and concrete blocks to create a stable platform for scaffolding. Adjustable screwjack legs on scaffolding are crucial for achieving plumb and level alignment, compensating for ground irregularities. Doubled-up 2×10 planks can safely straddle window wells, providing a secure working surface, while careful shimming ensures panels adhere correctly to the uneven substrate.
Fixing Misaligned Panels
Hardie panel installation PDF resources emphasize careful alignment from the start, but corrections are sometimes needed. Misalignment often stems from an unstable base or improper fastening. Gently shifting panels before fully securing them can resolve minor issues. For significant errors, carefully remove fasteners and re-position, ensuring proper overlap and gap spacing. Prioritize flashing integrity during any adjustments; compromised flashing voids warranties. Competent installation, as highlighted by experienced contractors, minimizes misalignment risks.

Troubleshooting and Problem Solving
Hardie panel installation PDF guides detail error correction; identifying issues early is crucial. Competent contractors are vital, as poor work frequently leads to significant problems.
Identifying and Correcting Installation Errors
Hardie panel installation PDF resources emphasize meticulous inspection throughout the process. Common errors include improper flashing—a critical failure point—and misaligned panels, often stemming from inadequate wall preparation or incorrect fastening.
Uneven surfaces require shimming, while fastener spacing must adhere strictly to manufacturer guidelines. Addressing these issues promptly prevents long-term water damage and structural compromise. A skilled contractor, referencing the PDF, can efficiently diagnose and rectify these problems, ensuring a durable and aesthetically pleasing result. Ignoring errors risks costly repairs later.
Dealing with Contractor Issues
Hardie panel installation PDF guides highlight the importance of a competent installer; unfortunately, issues arise. If a contractor deviates from best practices detailed in the PDF—like skipping flashing—document everything.
Poor workmanship necessitates clear communication and, if unresolved, potentially legal recourse. Regularly review progress against the PDF’s recommendations. Don’t hesitate to seek a second opinion from another qualified professional. Protecting your investment, especially with a significant home project, demands diligence and assertive action when contractors fall short.

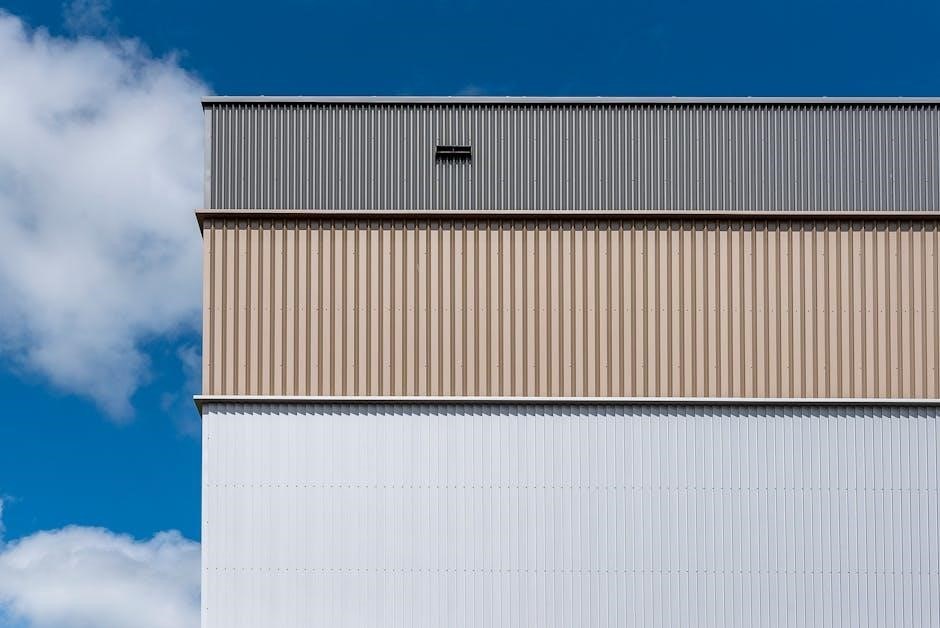
Hardie Panel Vertical Siding Specifications
HardiePanel siding, detailed in installation PDFs, is typically 5/16-inch thick, offered in 4×8 foot panels, with varied textures and pre-primed finishes.
Panel Thickness and Dimensions
Hardie Panel vertical siding, as outlined in comprehensive installation PDF documentation, generally maintains a consistent thickness of 5/16 inch. This provides a robust and durable exterior cladding solution. Standard panel dimensions are 4 feet wide by 8 feet long, offering efficient coverage for wall surfaces.
These dimensions facilitate easier handling and installation, minimizing waste during the cladding process. The 4×8 foot format is a common size, readily available and detailed within the manufacturer’s specifications found in downloadable guides.
Available Textures and Finishes
Hardie Panel siding, detailed in installation PDFs, boasts a variety of textures to suit diverse architectural styles. Options include smooth, which offers a sleek modern aesthetic, and a selection of woodgrain textures mimicking natural wood. Finishes range from factory-primed, ready for painting, to pre-finished color options.
These pre-finished panels provide long-lasting color and reduce on-site painting requirements. Detailed finish options and texture guides are readily available within the official James Hardie documentation.

Resources and Further Information
Hardie Panel Installation guides, including detailed PDF downloads, are available on the James Hardie Official Website for comprehensive project support.
James Hardie Official Website
James Hardie’s official website is the premier resource for all things related to their siding products, including detailed 4×8 Hardie panel installation PDF downloads. You’ll find comprehensive guides covering preparation, installation techniques, and best practices for achieving a professional finish.
The site also offers technical specifications, color options, and warranty information. Explore their “How-To” section for videos and articles, and utilize their dealer locator to find a trusted local supplier. Accessing these resources ensures a successful and compliant installation, maximizing the longevity and aesthetic appeal of your Hardie siding.
Hardie Panel Installation PDF Downloads
Numerous 4×8 Hardie panel installation PDF documents are readily available online, offering step-by-step instructions and visual aids. These guides detail crucial aspects like proper fastening techniques, flashing around windows and doors, and cutting procedures for precise fits.
Always prioritize official James Hardie documentation for the most accurate and up-to-date information. Supplementary PDFs from reputable contractors can also provide valuable insights, but verify their alignment with Hardie’s specifications to ensure a warranty-compliant installation.
Long-Term Maintenance and Care
Hardie panels require periodic cleaning and inspection; damage should be addressed promptly, referencing installation PDF guides for repair guidance and warranty details.
Cleaning and Inspection
Regular inspection, detailed in many 4×8 Hardie panel installation PDF guides, is crucial for longevity. Annually check for cracks, chips, or paint failure. Cleaning typically involves a gentle wash with water and a mild detergent; avoid high-pressure washers which can damage the surface. Inspect flashing around windows and doors for proper sealing, as detailed in the PDF documentation. Promptly address any issues to prevent water intrusion and maintain the panel’s integrity, extending its lifespan and preserving aesthetic appeal. Refer to the official James Hardie resources for specific cleaning recommendations.
Repairing Damage to Hardie Panels
4×8 Hardie panel installation PDF resources emphasize prompt damage repair. Small chips can be filled with fiber-cement patching compound, sanded smooth, and repainted. Larger cracks or breaks may require panel replacement, following the cutting and fastening guidelines in the PDF. Ensure proper sealing around repaired areas with appropriate caulk to prevent moisture ingress. Always match the texture and color when patching or replacing panels for a seamless appearance. Consult the James Hardie documentation for detailed repair procedures and recommended materials.